English
Views: 0 Author: Site Editor Publish Time: 2026-06-08 Origin: Site
Moving from product research to implementation planning marks an exciting milestone in your project. You finally chose the perfect materials for your outdoor space. Yet, even premium materials will underperform if the substructure falls short. Poor installation triggers voided warranties almost immediately. It causes severe buckling during seasonal temperature shifts. It leads to chronic drainage issues beneath the surface, destroying the frame.
We designed this verifiable, standardized installation framework to prevent those costly disasters. You will learn the precise technical requirements of modern wood-plastic composites. We help you accurately evaluate your DIY capabilities before you begin. You can also use this guide to forecast contractor requirements and timeline expectations. Master these foundational steps to protect your outdoor investment and ensure structural longevity.
Preparation is critical: Proper joist spacing and ground drainage dictate 80% of the project's long-term success.
Material dictates method: Different profiles (solid vs. hollow, grooved vs. ungrooved) require specific fastening systems and handling techniques.
Climate dictates spacing: Mandatory expansion and contraction gaps must be calculated based on local temperature fluctuations at the time of installation.
Risk mitigation: Avoiding common implementation failures saves significant replacement costs and protects product warranties.
Establish the foundation criteria before ordering or cutting any boards. Site preparation defines the lifespan of your entire project. Rushing the substructure guarantees surface failure.
Evaluate your soil stability first. Soft, loamy ground requires deep concrete footings below the frost line. These footings support the primary structural posts. Once you establish the posts, you must calculate a specific slope for the ground underneath the deck frame. A minimum 1% to 2% drop guarantees effective water runoff. Pooling water breeds mold and weakens wooden substructures over time. We recommend laying landscaping fabric and gravel over the graded soil to suppress weeds and further aid drainage.
Standard center-to-center joist spacing requirements dictate the frame's load-bearing strength. For standard Outdoor WPC Decking, spans typically range from 12 to 16 inches. Residential layouts often tolerate 16-inch spans without noticeable deflection. Commercial applications demand a tighter 12-inch spacing to handle heavy, continuous foot traffic.
Adjust these span requirements immediately if you plan a diagonal board layout. Diagonal setups change the weight distribution across the frame. They usually require a strict 10-inch joist spacing to prevent the boards from sagging.
Wood-plastic composites contain dense polymers. Polymers respond actively to ambient temperature changes. You must let WPC boards acclimate to the job site environment. Leave them resting flat on the ground for 48 hours prior to installation. Keep them out of direct, intense sunlight during this period. This crucial step stabilizes thermal expansion variables. Skipping acclimatization often guarantees warped boards immediately following the first major weather change.
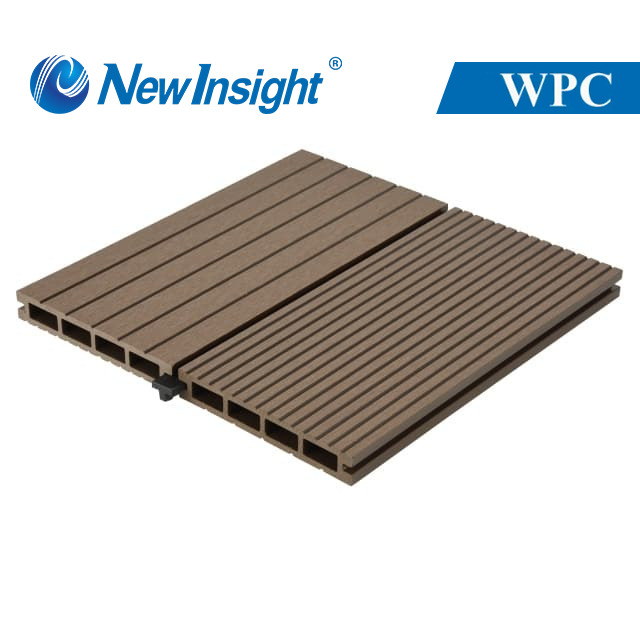
Align your specific product choice with the correct fastening and structural approach. Different profiles demand entirely different handling techniques. You cannot treat composite boards exactly like traditional timber.
Handling standard Traditional Composite Decking requires straightforward, traditional methods. These older-generation boards often arrive ungrooved. You must face-screw them directly into the joists. Always use color-matched composite screws. They blend seamlessly into the surface and feature special threads to prevent unsightly dimples around the screw head.
Working with modern Multi-Color Composite Decking changes the approach significantly. These co-extruded or capped boards feature a protective polymer outer shell. Surface integrity remains paramount here. Puncturing the cap with face screws compromises moisture resistance and aesthetic value. Therefore, they are highly suited for hidden fastener systems. Hidden clips slot perfectly into the side grooves, leaving the beautiful multi-color surface completely unblemished.
Installation considerations multiply for heavy-duty applications. Take a Reinforced Dual-Surface WPC Decking Garden Walkway Terrace as a prime example. You must evaluate reversible board patterns to maximize aesthetic flexibility. Many reinforced boards offer a woodgrain texture on one side and a slip-resistant ribbed texture on the other. Calculate strict load-bearing requirements before laying the framework. Plan specialized edge-finishing techniques, such as picture-framing, to protect exposed perimeters in high-traffic commercial zones.
Provide a transparent checklist to prepare the job site. Gathering the exact hardware prevents mid-project delays and structural compromises. Using the wrong tool damages the composite material.
Wood-plastic composites possess high density. This density requires specific cutting blades. You need a reliable miter saw or circular saw. Equip your saw strictly with a carbide-tipped blade featuring fewer teeth (usually 24 to 40 teeth). Fine-tooth blades generate excessive friction. This friction melts the polymer edges, leaving jagged, burnt cuts. Keep standard impact drivers handy for driving screws efficiently. Use specialized countersink bits to ensure screws sit perfectly flush on ungrooved boards.
Your fastener choice dictates the final aesthetic and structural integrity. Starter clips and end clips remain essential elements. You use them exclusively to lock down the first and last boards without face-screwing.
Next, compare hidden T-clips against stainless steel hidden fasteners. Plastic T-clips offer a fast installation speed and resist corrosion naturally. Stainless steel fasteners provide superior long-term hold under extreme structural stress. Finally, purchase dedicated fascia board screws. Standard deck screws lack the lateral flexibility fascia boards need to expand. Using standard screws here almost always causes severe fascia buckling during the summer.
Essential Installation Tool Checklist | |||
Tool Category | Specific Item | Primary Function | Common Mistake to Avoid |
|---|---|---|---|
Cutting | Carbide-tipped saw blade (24-40T) | Clean cross-cuts and rip cuts | Using fine-tooth steel blades (causes melting) |
Drilling | Countersink bits | Pre-drilling holes for face screws | Skipping pre-drilling on ends (causes splitting) |
Fastening | Stainless steel hidden clips | Securing grooved boards invisibly | Over-tightening screws into the joist |
Finishing | Fascia-specific screws | Allowing perimeter trim to expand | Using rigid wood screws on fascia boards |
The core Standard Operating Procedure (SOP) guides your field implementation. Follow these steps sequentially to build a safe, compliant deck.
Fix starter clips to the ledger board or the very first joist. Space them evenly according to manufacturer guidelines. Secure the initial plank by pushing it firmly into the clips. Drive the screws straight down. This first board establishes the baseline for your entire deck. Check it with a long level. If the starter board runs crooked, the entire layout will magnify the error.
Slide hidden fasteners into the exposed groove of the starter board. Drive the fastener screw halfway into the joist. Do not tighten it fully yet. Slide the next board into place, pushing it tight against the spacer tabs of the fasteners. Once properly aligned, tighten the fastener completely. This method ensures uniform gap spacing across the deck surface. Lock the boards into place sequentially, checking your alignment every four to five rows.
Temperature swings cause composite materials to shift constantly. Formulas for end-to-end (butt joint) and side-to-side gap spacing depend heavily on your installation temperature. Tight joints installed during cold winter days lead inevitably to summer buckling. Hot days require smaller gaps because the boards already reached maximum expansion.
Temperature vs. Expansion Gap Spacing Chart | ||
Installation Temperature (°C) | Side-to-Side Gap | End-to-End Gap (Butt Joint) |
|---|---|---|
Below 10°C (Cold) | 6 mm | 5 mm - 6 mm |
10°C to 25°C (Moderate) | 5 mm | 3 mm - 4 mm |
Above 25°C (Hot) | 4 mm | 1 mm - 2 mm |
Decks often feature posts, pipes, and permanent architectural structures. Measure twice before making complex cuts. Mark the board carefully using a framing square. Cut cleanly using a jigsaw for curved obstacles. Never compromise board integrity by cutting too close to the load-bearing edges. You must leave a small expansion gap (typically 5mm) around all solid objects. If you notch a board too tightly against a post, the board will crack when it expands.
Seal the perimeter properly to protect the substructure from UV rays and wind-blown debris. Use overlapping techniques at the corners to hide rough cuts. You can also use dedicated corner trims. Adhere strictly to specific fascia fastening rules. Fascia expands differently than standard deck boards because it hangs vertically. Drill oversized pilot holes in the fascia board. This allows the board to slide slightly left and right under the screw head during temperature shifts.
Prevent typical errors to protect your investment. Manufacturers inspect failed decks rigorously. They will deny warranty claims if they spot these common installation faults.
Driving screws too deep damages the protective polymer surface. It creates a small crater known in the industry as mushrooming. Water pools easily inside these depressions after rainfall. The standing water accelerates localized degradation and attracts dirt. Always use a drill with an adjustable clutch setting. Stop driving the screw exactly when the head sits flush with the board.
Decks require constant breathing room. Failing to leave cross-ventilation space under the deck traps moisture rising from the soil. The trapped dampness accelerates substructure rot rapidly. Even if the WPC boards remain 100% waterproof, the treated wooden joists beneath will decay. Ensure at least two sides of the deck remain open for airflow. If you install skirting, use lattice or louvered panels to encourage active air circulation.
Never ignore board overhang restrictions. Strict structural guidelines govern how far a WPC board can safely overhang the final joist. Generally, do not exceed a one to two-inch overhang. Pushing past this limit removes crucial support. Exceeding cantilever limits risks snapping the board entirely under human load, creating a severe safety hazard at the edge of your deck.
Determine your capabilities honestly before breaking ground. WPC installation demands physical stamina and precise measurement skills.
You can tackle this project alone under specific conditions. Choose the DIY route for smaller, ground-level patios. A standard square or rectangular footprint makes cuts simple and predictable. You need a strong, working familiarity with carpentry tools, structural leveling, and squaring techniques. If you understand how to build a perfectly level frame, laying the composite boards becomes a straightforward, repetitive task.
Some projects demand expert intervention immediately. Hire out for elevated decks requiring structural municipal permits and deep concrete pilings. Complex layouts like herringbone, chevron, or multi-colored picture-framing require advanced carpentry math and precise miter cuts. Furthermore, large commercial spaces demand dedicated crews, commercial liability insurance, and certified installers who understand high-traffic compliance standards.
Request a takeoff: Ask your supplier for an accurate material takeoff based on your architectural drawings to prevent over-ordering.
Order samples: Order sample boards to test workability, color-matching, and scratch resistance in your actual yard.
Find an installer: Locate a certified local installer to review your blueprints if the structural framing exceeds your comfort zone.
Installing WPC decking requires absolute precision, but the rules remain highly predictable and standardized. Proper groundwork, strict adherence to joist spacing, and respecting thermal expansion gaps dictate your success. Skipping acclimatization or using the wrong fasteners will sabotage premium materials. However, following a standardized approach guarantees a flawless finish.
A properly installed composite deck offers decades of low-maintenance value. It resists rot, splinters, and fading. This immense longevity completely offsets the initial, careful labor required during installation. Take action today to start your project correctly. Request a custom material quote from your supplier. Use a reliable decking material calculator to double-check your dimensions. Contact the technical support team to verify your project blueprints before making the very first cut.
A: You should never install WPC boards directly onto solid surfaces. Direct contact traps moisture and blocks ventilation. Instead, install a sleeper system. Fasten treated wooden or metal joists over the concrete first, creating at least 1.5 inches of clearance. This provides mandatory cross-ventilation and protects the substructure.
A: The ideal installation temperature ranges between 10°C and 25°C (50°F to 77°F). Installing within this moderate window minimizes extreme thermal expansion or contraction. If you must install during extreme heat or freezing cold, you must adjust your gap spacing accordingly to prevent seasonal buckling.
A: You use standard woodworking tools, but you need specific blades. Always use a carbide-tipped saw blade with a lower tooth count (24-40 teeth). Fine-tooth blades generate too much friction, which melts the plastic polymers in the composite board and creates jagged, scorched edges.
A: You have three effective options. You can insert color-matched plastic end caps directly into the hollow chambers. You can cover the entire perimeter with matching composite fascia boards. Alternatively, you can use a "picture-frame" installation layout, which uses solid boards around the border to hide all cut ends.